This article will guide you through uploading your own wet-signed agreements to the platform. The process is the same for both: EMI, and Unapproved Options.
Once you have authorised an Option Pool, and designed the option scheme, you are ready to upload the signed agreements, if you have them.
We can digitise a template of your own bespoke agreements (for a one-off fee) as long as they fulfil certain criteria, so all agreements that the platform generates in the future will follow this structure.
For all of our customers, the platform generates all of the necessary paperwork, so there's no need to use your own agreements if you do not want to. If, for whatever reason, you would prefer to use your own agreements and sign them off-platform, just follow the steps below.
First, you will need to create all of the necessary distributions in Draft. To do so, just follow the steps of this guide on how to design your Option Scheme until the very end. Don't worry, clicking "Save as draft and add another" will not send anything to recipients. Once you're done, come back to this article.
You can find your draft distributions by going to 'Share schemes' > 'All option agreements', which will take you to the EMI & Options page:

From here, just click on the name of the distribution you want to change:

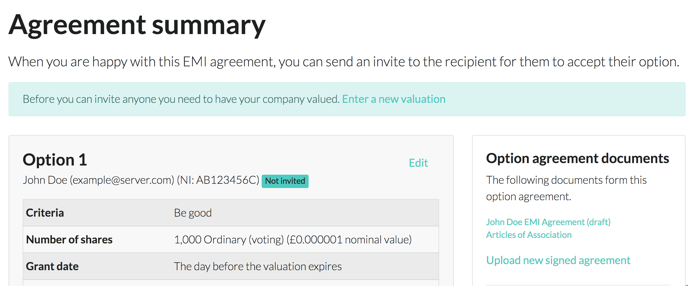
Which will take you to that Agreement Summary page:

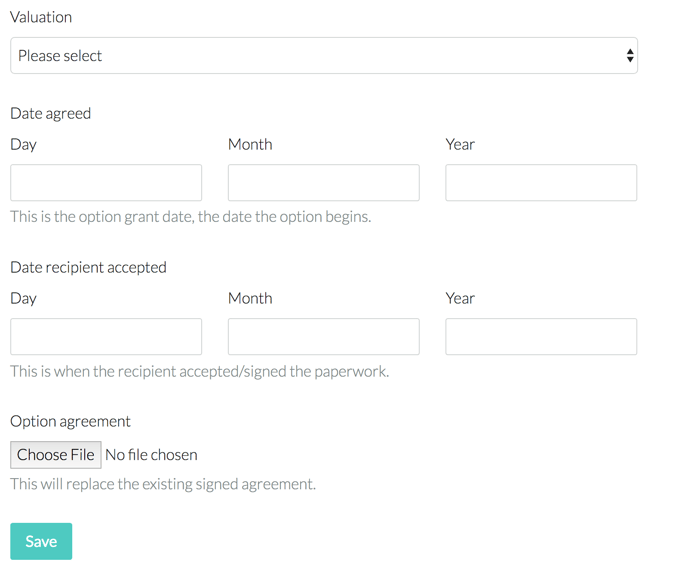
On the right-hand side, in the "Option agreement document" box, you will see a link to "Upload new signed agreement". Clicking this will take you to a page where you can select the file you want to upload, and enter a few details:

You will need to:
- Select a Valuation that covers the date on which the Option was issued;
- Tell us the date the Option was granted;
- Tell us the date the recipient accepted the Option (these last two dates are often the same);
Then choose the file you wish to upload, and click Save.
This will take you back to the Agreement Summary page, which will now have a link to the signed agreement in the "Option agreement documents" box on the right.
Review the details on this page, and make sure they match what is in the agreement you just uploaded: name, number of shares, start date, and vesting schedule need to be correct. If anything needs changing, click the Edit link to the right of the recipient's name.
Once you are happy, just click Save. On the Agreement Summary page, click Send Invite, and you're all done!
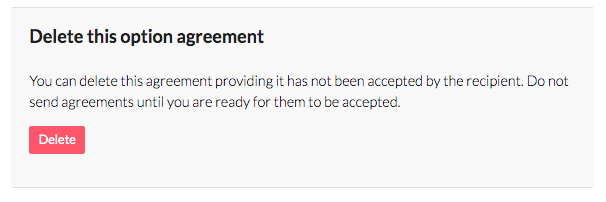
Provided you haven't yet sent the invite, if it has all gone wrong and you want to start again, just click Delete at the bottom of the page and try again:

Our team, content and app can help you make informed decisions. However, any guidance and support should not be considered as 'legal, tax or financial advice.'