How do I issue shares on Vestd?
A step-by-step guide to issuing shares in minutes.
Once you have Authorised a Share Pool on the platform, you can start distributing shares.
First, log onto the platform, and go to 'Share capital' > 'Issue shares'.
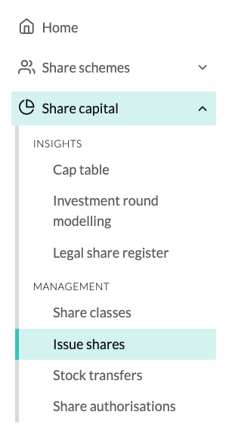
Here, click 'Distribute ordinary shares':
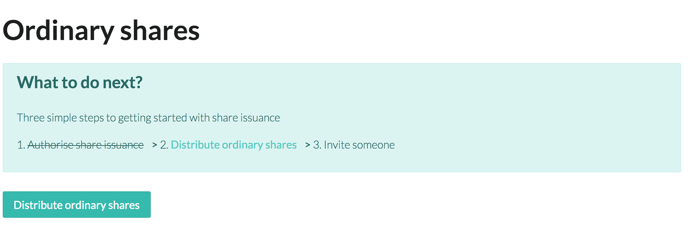
Now it's time to give this distribution a name and select the shareholder from the drop-down menu.
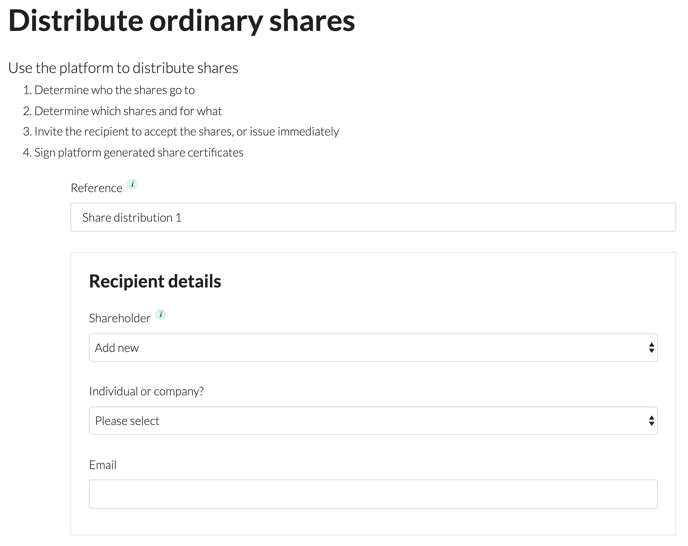
If you're distributing to a new shareholder, select the appropriate option from the "Individual or company" drop-down and enter their name and email address:
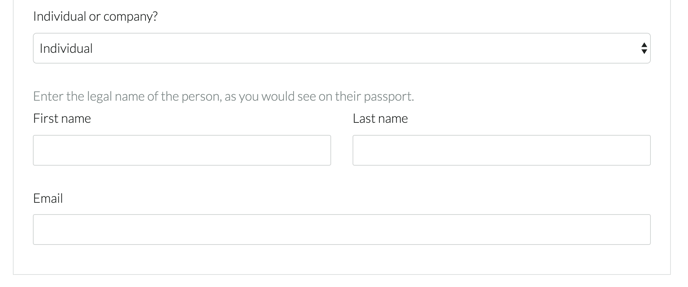
No one will get emailed just yet, this is just for our records.
Once you've entered the shareholder's information, it's time to decide the details of the share issuance:
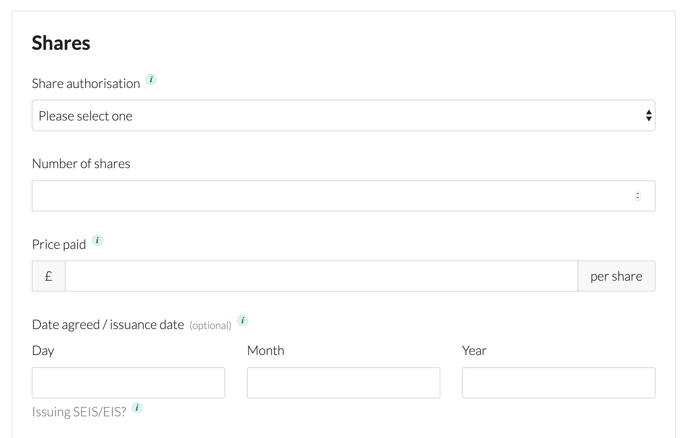
Here you will have to select:
- Share Authorisation: the share pool you want to issue these shares from
- Number of shares to be offered to this shareholder
- Price paid per share
The Date agreed/issuance date is optional, but if there's a particular date on which the shares were issued, like an Investment Round, enter that date here.
If this Date section is left blank, the date on the share issuance will default to either:
- The date the shareholder accepts these shares
- The date that you issue them (depending on what you choose later. Don't worry, it's all explained further down).
All of this can be edited on the next page, so don't worry if you're unsure.
From the Date section, scroll down, and you will see four more Optional bits. These are rarely used:
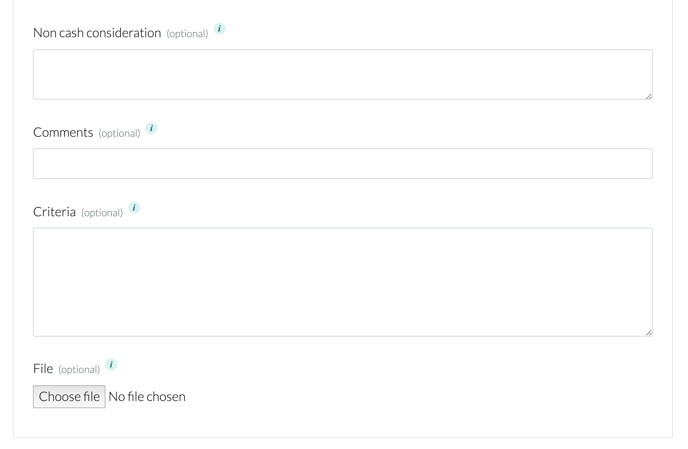
The Non cash consideration is anything else that you may have exchanged for the shares, other than money.
The Comments are there as a catch-all field for any notes you want to save.
The Criteria and File are there in case there are conditions to the shareholder receiving these shares.
Again, the last four Optional bits are rarely used, so don't assume that you need any of these filled in.
Once this page is filled in, click 'Save as draft' in the bottom left of the page. You can still edit make edits later if needed.

Once saved, you'll land on this page:
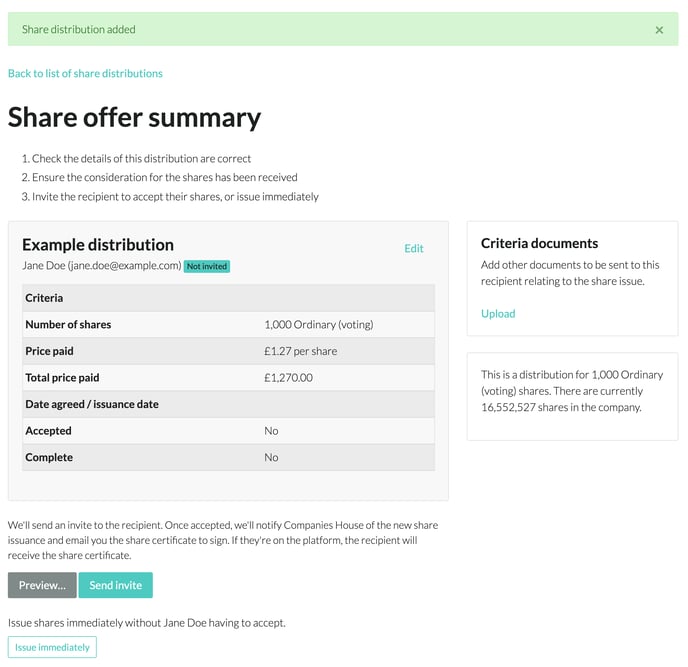
From here, you can click 'Edit' in the top right of the summary box, which will take you back to the previous page in case you need to change some of the details.
If you have Criteria documents to upload (those rarely-used ones), click 'Upload' in the Criteria Documents box on the right of the page.
Below the summary box, you have two choices:
- You can click 'Send invite', which will send an email to the shareholder asking them to accept the offer. You can preview the email they will receive by clicking the grey 'Preview' button.
- We will file the SH01 for you. If you've left the 'Date' blank, the date that the shareholder accepts this distribution will become the date of the issuance. If this distribution is from a particular date, like an Investment Round, click Edit to go back to the previous page, and enter this date in the Date agreed/issuance date section.
- Clicking the 'Issue immediately' button will issue the shares without the recipient having to accept them. They will not get an email alerting them of the issuance, but all of the relevant forms will be sent to Companies House.
- We will file the SH01 for you, and use the date you clicked 'Issue immediately'
Or, if it's all a mess and you want to scrap the whole thing, scroll to the bottom of the page and click the big red 'Delete' button:
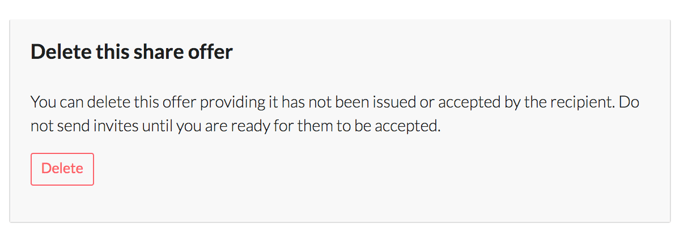
Congratulations! You've issued shares through Vestd. All of the Share Certificates and SH01 forms will be taken care of automatically.
Our team, content and app can help you make informed decisions. However, any guidance and support should not be considered as 'legal, tax or financial advice.'